6 episodes
Aired between 8th April 1967 and 13th May 1967
Written by David Ellis and Malcolm Hulke
Produced by Innes Lloyd
Directed by Gerry Mill
Synopsis
The TARDIS lands on the runway at Gatwick airport.
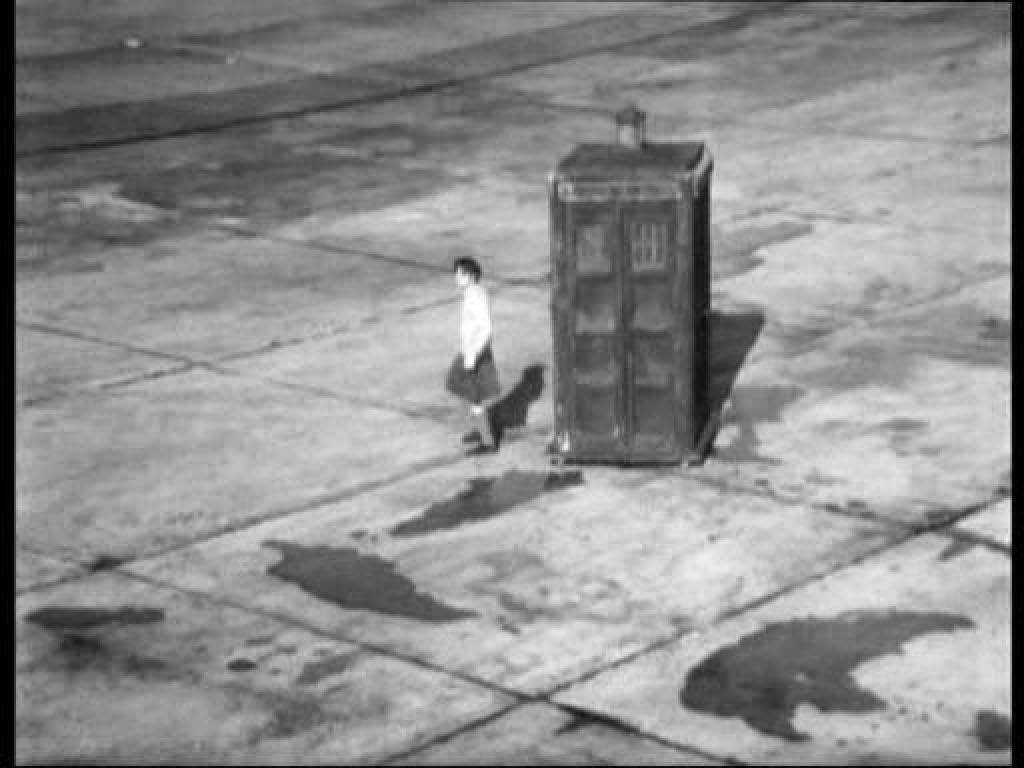
It's not long before they're spotted by airport Police. They scatter to avoid capture and the Policemen give chase, ordering the TARDIS to be hauled away.
Polly hides in one of the hangars belonging to Chameleon Tours, and witnesses one of the firms pilots killed by some kind of space age pistol. The Pilot retrieves an envelope from the corpse and goes off to a room behind a hidden compartment. Whilst he's gone, Polly checks the dead man, but is soon discovered by the pilot (who watched her on a security monitor). He tries to kill her, but she gets away. Polly finds the Doctor and Jamie hiding under a plane.

She tells them what she saw, which piques the Doctor's curiosity.

In the Chameleon hangar, the chief pilot, Captain Blade arrives to speak to the murderer (Spencer). Spencer explains that he had to kill the man because he found out about the "postcards". It turns out the man was Detective Inspector Gascoigne. Blade and Spencer remove all his possessions, and are in the hidden room when their alarm alerts them to the Doctor, Jamie and Polly snooping around the body. They watch on hidden monitors as the TARDIS crew check the body, astounded to notice that he died from electrocution. They rush off to find someone in charge.
With the fact that Polly saw the killer, Blade and Spencer decide to abduct her as the group march off, determined. They knock her out with some kind of "freeze-pen".

The Doctor and Jamie eventually realise that Polly is gone, but cannot find her. They spur themselves on and go to the customs desk. There, they make nuisances of themselves until the officer at the desk agrees to contact the airport's Commandant.

Ben meanwhile has been skulking about the place, and eventually finds the Chameleon Tours hangar. He wanders in to find Captain Blade securing a packing crate. When the Captain notices he's being watched he goes for his space-gun, but the Commandant's assistant turns up with new flight schedules for Chameleon Tours. This forces Blade to bluff and allows Ben to go free.
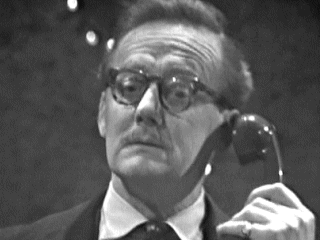
The Commandant visits the Doctor and wants to know if they'r involved in leaving a big blue Police Box on the runway. The Doctor and Jamie are totally candid with the Commandant, spouting all sorts of nonsense about aliens and murder, which the Commandant refuses to believe, especially when the Doctor and Jamie have no sort of passports and cannot explain how they got there. Eventually, the Commandant agrees to go with the Doctor to the Chameleon hangars to look at the body.
Back in the hangar, Blade is putting postage stamps onto post cards when Spencer arrives. He informs the Captain that Polly has been "processed" and can leave on the next flight. He thanks Spencer and moves to a cabinet where there is a horrid scabbed arm inside. Blade gives the thing an injection, but suddenly sees the Doctor on the security camera, poking around the place with the Commandant and airport security.
As you might expect, the body is gone, but the Doctor does find an unused Spanish postage stamp, burnt fibres, and a burn mask nearby. They begin to open one of the packing crates, believing the body to be inside, just as Captain Blade turns up. He agrees to help them open the case and there is only plastic cups inside. The Commandant dismisses the Doctor's wild allegations and hauls him and Jamie away.
Once they're gone, Blade orders Spencer to help him get the creature out of the hangar. They dress it up as a pilot and huddle it through the airport until they reach the sick bay.
The Doctor and Jamie are dragged away, back to customs where they're interrogated themselves. As they desperately try to prove they're not lying, they suddenly spot Polly walking through the metal detector. They rush to her and ask her to help them but she says she doesn't know them. She introduces herself as Michelle Leupi and says it's her first time in England.

The Commandant takes her word for it and calls the Police, leaving the Doctor and Jamie no other option but to leg it.
In the sickbay, the nurse (Nurse Pinto) arrives to attend to the hideously malformed creature.

She puts it on a bed next to an unconscious air-traffic controller and attaches futuristic looking headsets to them both.

As the controller (called Meadows) begins to twitch, the creatures face morphs into an exact copy of Meadows.

When the false Meadows comes around, he is questioned about his knowledge of Meadows' life.
The Doctor and Jamie eventually run into Ben, who shows them that Chameleon Tours have a sales desk inside the terminal, selling holidays to young people (18-25 year olds). They see Polly, now working at the kiosk, and the Doctor approaches her. She resists his questioning, but accidentally admits to seeing someone shot. Despite this, the Doctor has little choice but to leave her alone. When he's gone, Polly contacts Blade and explains what's happened. The Captain tells her to return to base on the next flight and he'll deal with the Doctor.
The false Meadows is relesaed from the sick bay and returns to the control tower. There he sees D.I. Crossland asking the Commandant about the whereabouts of his partner, D.I. Gascoigne.
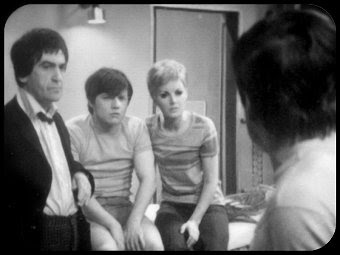
Ben, Jamie and the Doctor regroup, hiding inside a photo booth to come up with a new plan.


They agree that Jamie will keep an eye on the Chameleon Tours kiosk, the Doctor will try to make the Commandant accept the truth, and Ben is to check out the hangar again.
As the others rush off, Jamie is left hiding behind a newspaper watching the kiosk. He soon sees a scouse girl by the name of Samantha Briggs. She complains to Polly that her brother, Brian is missing.

He was last reported going on a Chameleon Tours holiday to Rome. She's tried to call the hotel he said he was staying in, but the hotel doesn't exist and he seems to have vanished without a trace. Despite this, she's received a post card from him, posted in Rome. Polly invites her to speak to Captain Blade, but she'll have to wait for him to return. Samantha agrees and takes a seat next to Jamie.

He makes his move on her, telling her that the Doctor could help her find her brother. Not long after, Polly closes the kiosk and leaves.
When the Commandant is paid a visit by the Doctor, it takes him half a second to call for Security on the madman.
The Doctor resorts to bluffing that he's holding a bomb in order to escape. The reality is, it's a rubber ball.
Ben arrives back at the hangar and finds the real Polly in some sort of coma inside one of the packing crates. He goes to the Chameleon office to find a phone to inform the Commandant.

The Doctor makes his way back to Jamie, and is introduced to Samantha. Now that the kiosk is unmanned, the Doctor leads Jamie and Samantha to snoop around the back office. There they find a a large batch of postcards from around the world, and lots of unused stamps. They also see a surveillance monitor that reveals Ben inside the hangar. They watch helplessly as Spencer creeps up behind him and attacks Ben, stunning him with the freeze-pen. The Doctor rushes off to the hangar and tells Jamie and Samantha to still keep an eye on the kiosk.
At customs, DI Crossland is making enquiries and soon finds out about Samantha asking questions about her brother, and hears about the Doctor and Jamie's escapades. He decides that he wants to find and speak to the Doctor, feeling that he will know something about his missing partner.

A new woman arrives to staff the kiosk, and puts up an advert for flights to Zurich. As people begin to board, they are all given postcards to write from Zurich before they've even got there. Samantha comes to the conclusion that her brother wasn't in Rome at all. Her and Jamie set off to tell the Doctor, but are collared by DI Crossland.
The Doctor meanwhile arrives at the hangar and begins looking for Ben. He is gone, but the Doctor does find one of the freeze-pen's lying about. He pockets it and keeps on searching, eventually finding the real Meadow's (air traffic controller, remember?) inside a packing crate.

Suddenly, he hears a faint voice calling for help, originating in the back office. The Doctor investigates, only to be sealed inside the room whilst freezing gas is pumped into it. from hidden vents in the walls.
Thinking fast, the Doctor locates the security camera and covers it up with his jacket. Blade, who's been watching the Doctor has to resort to entering the room to check on his prey. The Doctor is lying frozen on the ground, but suddenly jumps up and freezes Blade with the freeze-pen! He gathers up his jacket and quickly escapes.
The Doctor returns to the kiosk, where Jamie introduces him to DI Crossland. The Inspector is filled in on the goings on, and agrees to take the Doctor back to the Commandant to get some answers. Jamie and Samantha are told to....you guessed it, watch the kiosk. Samantha is bored of that, and when the Doctor leaves, manages to use her feminine charm to convince Jamie to go with her to the hangar to look for answers.
Blade finally comes around from the freeze-ray and contacts Spencer, ordering him to find and kill the Doctor, whilst he pilots the Zurich flight.

Once back before the Commandant, the Doctor shows him the freeze-pen as evidence, and says he suspects one of the staff to be an imposter that helps Chameleon Tours mass-abduct young people! The Commandant is still skeptical until the Doctor freezes his cup of tea. The Commandant allows the Doctor and Crossland to inspect Chameleon Tours' flight records.

Samantha and Jamie get to the hangar and investigate the back office. It's not long before they find a stack of falsified post cards. They take this to the Commandant and the Doctor. With this compelling evidence, the Commandant gives the Doctor full access to Gatwick Airport for 12 hours and expects some concrete evidence at the end of it. The Doctor's overjoyed and begins to ask questions, discovering that Gatwick cannot track aircraft beyond 130 miles of the airport. As he leaves, the false Meadows plants a "button" onto the Doctor's back.
Whilst the Doctor and co. go back to search the hangar with authority, Crossland goes to confront Blade. It turns out that Blade is returning from a flight, but agrees to see the Inspector on his aircraft. Crossland begins to ask unnerving questions in front of all the passengers waiting to start their holiday. Blade reluctantly agrees to cancel the flight and goes to power down the aircraft whilst Crossland waits for him in the passenger section. Crossland agrees, but Blade suddenly begins to take off. Crossland fights his way to the cockpit, where he sees lots of alien looking controls. He is captured and the flight leaves.

Searching the hangar thoroughly, the Doctor discovers a hidden room in the back office. It contains a cubicle with strange air vents for "someone not used to Earth atmosphere". They also discover the surveillance equipment that's currently focused on the sick bay. They begin to set off there, but the "button" on the Doctor's back activates, causing him great agony. In the confusion, Spencer turns up and freezes them all. He places them in a line and sets a slowly moving laser beam arcing towards them.

On the flight, Crossland is strapped to a chair and allowed to watch as the passengers onboard the flight suddenly disappear when Blade twists a dial in the cockpit.
Although it's a huge effort, Samantha manages to move her arm enough to retrieve a compact mirror from her nearby handbag and diverts the laser beam back onto itself, blowing it up. As they recover, the Doctor asks her to go back to the kiosk, whilst Jamie and him go to the sick bay.
In said sick bay, the customs officer, Jenkins, undergoes the headband process and has an evil doppelganger created. Nurse Pinto is checking him over when the Doctor and Jamie enter. They try to bluff their way into the x-ray room, but Nurse Pinto refuses. They decide to find Crossland who can help insist on access. They ask the Commandant, but he hasn't reported to him in ages.
As they are figuring Crosslands whereabouts, they come across something even more interesting. The Commandants assistant tells them she has been checking out Chameleon Tours' other businesses around the world. In each case, the airports explain that flights leave from Chameleon Tours, but none ever seem to arrive. The Commandant suggests they're using private airfields, but the Doctor reckons they're being taken into outer space (everyone rolls their eyes). They decide to have the next flight tailed by a jet fighter from the RAF.
Turning back to the problem of the medical centre, the Doctor convinces the Commandant's assistant to distract Nurse Pinto whilst he has a look around. She fakes an illness and Nurse Pinto is forced to come out from the sick bay to the control tower to deal with it.
Back at the kiosk, Jamie joins back up with Samantha to find that she's bought a ticket for the next Chameleon Tours flight, determined to find out what's going on. Jamie is worried about her and when she refuses to give him the ticket, he steals it by distracting her with a kiss.

The Doctor makes it to the now empty sick bay and searches the x-ray room. He flips a switch and finds the real Nurse Pinto motionless inside a hidden compartment. He closes the compartment again, and finds some strange looking armbands, colored white and black and covered in controls. The false Jenkins sees him snooping around and prepares to shoot the Doctor, but is forced to hide again when a member of the public enters. The Doctor leaves with the arm bands. When he gets back to the control tower, he winks at the Commandant's assistant who suddenly makes a miraculous recovery.
Samantha goes to board her flight, but finds that an S.Briggs has already checked in. Spencer recognises her and immediately captures her.
On the plane, Jamie gets very air sick and rushes off to the bog at the back of the plane.
Meanwhile, in the cockpit, Captain Blade realises that they're being followed by an RAF fighter and decides to shoot a laser beam directly at the jet, striking the pilot and killing him. In Air Traffic Control, they watch the radar fearfully as the jet goes off course and crashes. They also see the passenger aircraft stay still before it blinks off the screen, indicating that it dropped straight down and crashed too. The Doctor speculates that it actually went straight up!
On the aircraft, the air hostess goes around the seats, picking up small objects and placing them in a tray. Outside the ship transforms until it looks something like Thunderbird 1. The aircraft leaves the atmosphere and docks with a large alien spacecraft.

Jamie emerges from the toilet to see Captain Blade and the air hostess discussing someone called the "Director". Two of the unchanged chameleon creatures turn up and begin removing luggage, whilst the hostess takes the tray to some kind of storage room. Jamie makes his way into the room, and discovers that the tray holds all the passengers, shrunk down to tiny doll size and frozen. He's captured shortly after by the hostess and two Chameleons.

Back in the control tower, they receive confirmation that the RAF fighter crashed, the pilot was electrocuted, but there's no sign of the Chameleon flight's wreckage. The Doctor is almost at a loss of how to prove all this alien shenanigans (beyond reasonable doubt) when the false Meadows returns to work. He recognises him and forces the man to roll up his sleeve. Meadows tries to escape, but he's caught and eventually reveals that he had a black armband on.

After a few threats, the false Meadows explains that he is an alien. He's part of a race that suffered a catastrophy when their sun went super nova and burnt away their identities. To regain them, the aliens decided to use their technology to steal them. They've collected 50,000 identities so far, many of which are hidden around the airport, but he begs them not to search for them. He confirms that Nurse Pinto is in charge of the technology that steals identities, and only she knows where they are. Logically, the Doctor insists that they go and see Nurse Pinto, taking the false Meadows with them, and some Policemen.
Nurse Pinto is with a bound and gagged Samantha.

The Doctor arrives just in time and arrests Pinto, taking her freeze-pen. He releases Samantha who tells him about Jamie. Meadows reveals the real Nurse Pinto in the hidden compartment. The false Pinto suddenly pulls out a ray gun and shoots one of the Policemen. She rushes into the x-ray room and is about to kill the false Meadows, but he rushes to the grabs the real Pinto's arm band and tears it off her, reducing the doppelganger to a horrid bubbling mess on the floor.
On the spaceship, Jamie is joined by D.I.Crossland who he assumes is there to free him. Crossland explains that the miniaturization process is kick-started by eating the in flight food (something Jamie didn't do because he was too busy throwing up in the toilet). Jamie becomes increasingly suspicious when Crossland begins asking him about the Doctor, especially the Inspectors hint of a Scottish accent has strangely disappeared. The false Crossland eventually admits that he is actually "the Director". He explains to Jamie that there's to be only one more plane to Earth to pick up the originals before they leave for their home planet.
Back on Earth, the Doctor finds records indicating 25 people in the airport have been copied. When he hears that the final flight of the season is due to leave shortly, he convinces the Commandant not to arrest these Chameleons, instead bluffing his way onto the flight pretending to be one of them, along with the real Nurse Pinto. The Commandant agrees.
As the Doctor and Pinto go off, Samantha and the Commandant's assistant begin helping the Police to find the original bodies.
Sure enough, the Doctor and Pinto get to the space station.

Blade reports to the Director, stating that he knows they're impostors. He wants them killed, but the Director disagrees. He instead questions the now false Jamie about his knowledge of the Doctor. Armed with this knowledge, he instructs Blade to capture Pinto and the Doctor, which he does.

Back on Earth, the Commandant has little choice but to incite panic by shutting down the airport and stopping all flights until they've located the originals.
The Doctor and Pinto are taken to see the Director, and come face to face with the false Jamie (who has also lost his Scottish accent). The Director announces that he will decide who gets the Doctor's body in the transfer process.
The Doctor begins cleverly playing them off against each other, suggesting that the Director has no need to be worried what's happening on Earth anymore because his original body is up here, but what about the rest? The Director brushes the threat off, but once he's left the room, the Doctor works on Captain Blade, suggesting that they've already found the originals and if they don't begin to negotiate, then the humans will begin ripping arm bands off, thereby killing the Chameleons.
Blade is sufficiently unnerved enough to get the false Jamie to contact Gatwick and ask them where they found the bodies. The Commandant guesses what's happening, and stalls for time by giving vague answers.

The Director finds out and is angry that one of his own kind doubted him. He orders that all communication is cut off with Gatwick. Blade reluctantly prepares the Doctor for transference, but doesn't see him buy some time by sabotaging the machine, blowing it up. The Director scowls and says that he's only delaying the process, and orders a new machine be brought over.
Samantha and the Commandant's assistant eventually discover the bodies, hidden in the cars parked in the car park of all places.
The Doctor is strapped into the new machine and is about to be transferred when a call from Gatwick comes in.

The Director ignores it until the false Jenkins at his side suddenly melts away. Fearing for his life, the false Blade points a gun at the Director and forces him to answer the call. The Commandant orders the Doctor and Nurse Pinto released or they will be destroyed. The Chameleons reluctantly agree.
Once free, the Doctor negotiates a peace, stating that the aliens must return every single identity that they've stolen, and get their scientists to find another way of regaining their individuality. In fact, the Doctor could suggest one or two different things that might help. The Director says that it's impossible as the machinery to do that is on their home planet, but Blade calls him a liar and says it will be done. The Director calls him a fool and tries to escape, but Blade shoots him dead.
It's not long before everyone is freed and returned to Earth. The Commandant gladly says goodbye to the Doctor and tells him which hangar the TARDIS is stored in. Jamie says an awkward goodbye to Samantha, consoling her that at least she'll be reunited with her brother. She gives him a full on snog and they leave.
Outside the hangar, the Doctor and Jamie meet back up with Polly and Ben. The pair are a little bit disappointed that they've got to leave Earth so soon after they've finally found their own time, and indeed discover that it's just about the exact same date that they left earth in the first place. Ben suggests that he could go off and get back to his ship (the floating kind), and Polly could return to normal life. The Doctor is clearly put out by this, but agrees, wishing them all the best. He and Jamie say their fairwell's to the pair and watch them leave.

Jamie says he's upset that Ben and Polly have gone, but the Doctor says they've got a more pressing problem to deal with - the TARDIS is gone!
Trivia
- Anneke Wills haircut was only a wig. She did it to see if her husband liked it. She decided to leave the show because she wanted to avoid being typecast (a reason used by many over the coming years).
- It's rumored that Michael Craze left because this town wasn't big enough, but Anneke Wills disputes that, saying they all got on well and that it was more to do with him not getting his contract renewed because Innes decided that the young hip kids didn't work.
- Pauline Collins was asked to be the next companion as Samantha Briggs, but she surprisingly turned it down. This meant that the script for the final episode had to be quickly amended,
- It's worth noting that from episode 2 of this story, the title music was changed, ending the long run of Delia Derbyshire's original score.
What worked
- The creatures look awesome, really unnerving

- The build up of the mystery in episode 1 is fantastic
- The Doctor's mad-capped investigation and running around the airport in episode 2 is equally entertaining
- The fact that they've got the run of Gatwick Airport, I mean there's a lot of shot that are intentionally there to say "wow, look at how cool this is!"
- The jet fighter incident was unexpected and quite unnerving at how "final" it was
What didn't work
- Why do the Chameleons put Polly out there immediately after she's captured? Surely they know that the Doctor will recognise her.
- The Chameleons use the same trick as The Thing from the Fantastic Four - put on a hat and a long coat, and no one will recognise the fact that you're face is all sorts of messed up
- Jamie's knees and kilt surely give him away, even if he hides his face behind a newspaper
- Another story with Bond-style death traps
- There's just too much time spent messing about video calling people
- What is the logic behind giving people postcards before they've gone on holiday. Surely the passengers would question it.
- Samantha goes from flirty to upset to flirt in 0.2 seconds.
- The Doctor's never been worried about Polly and Ben, and this just proves it.
- The fact that the sun burnt away all their identities
- Finally, where's the most secret place to hide "dead" bodies? In the car park where airport security are sure to check on a regular basis!
Overall Feelings
You would think that with Doctor Who finally being given permission to film across Gatwick Airport, that the story would follow similar lines to the Dalek Invasion of Earth, i.e. big location shots and very little plot. Whilst there is some of this involved, it's not nearly as much about that as just a cracking story.
The location is fantastic, I agree. From the very beginning of episode 1, there's huge shots where you're just prone to staring at the screen, mouth agape thinking (with 1960's head on) - "yeah, nothing like this has ever been done on Doctor Who before!" What's great though is that it's accompanied by a brilliantly compelling (and chilling) introduction to the main plot, and backed up by genuinely hilarious interplay between Patrick Troughton and Frazer Hines. This is a glimpse at the masterpieces to come, and their messing about in customs is just magical.
Similarly, episode 2 is well put together, with the viewer getting a good feeling of urgency about finding Polly, and discovering exactly what is going on. The comedy doesn't let up here either, with a rather fun scene inside the photo booth.
It's a huge shame then that this was in fact a six-parter. From the end of episode 2, the pace is slowed right down, the Doctor never really questions what's going on with Ben and Polly again, and we get lots and lots of people talking into video monitors, or escaping from stupid death traps which are guaranteed to fail because we learned long ago that the Doctor and Co. will (nearly) always survive.
The tension never really picks up again until the end, where the Doctor starts playing the chameleons off against one another, but even that is sort of spoiled by the beyond moronic decision for the Chameleons to hide their bodies in the parked cars. They weren't even put in the car boots!
The Faceless Ones is undeniably good, with a strong hook, comparatively logical investigation to it, and pretty scary looking bad guys. The conclusion is also refreshingly great, when you consider that most stories in Patrick Troughton's run were "they're evil, 'cause they're aliens".
Rating
8 out of 10
First two episodes are mint, 3-5 drag considerably before it ends decently at the back half of episode 6.
Rewatchability Factor
5 out of 10
Good story, but long to watch once you know it.
Watch this if you liked...
- The Rebel Flesh (Doctor Who, Series 7)
- Invasion of the Body Snatchers
- Die Hard 2
What is your favourite Doctor Who location shoot?